Culinary Skills 1
UNIT 4 |

|
Basic Cooking Methods
Moist Heat Cooking
|
GOALS:
OBJECTIVES:
- Practice key techniques such as simmering, blanching and steaming
- Identify key moist-heat cooking methods
OBJECTIVES:
- Describe basic techniques such as simmering, blanching and steaming
- Identify key moist-heat cooking methods
- Use moist-heat cooking methods to prepare a variety of dishes
- Understand the importance of temperature control in moist-heat cooking.
- Identify and describe key dry-heat cooking methods that don't use oil
- Practice hey techniques, including dry saute and roasting
- Concentrate and reduce ingredients to maximize flavors in recipes without the use of oils
Basic Cooking Methods
Getting Set Up for this Unit
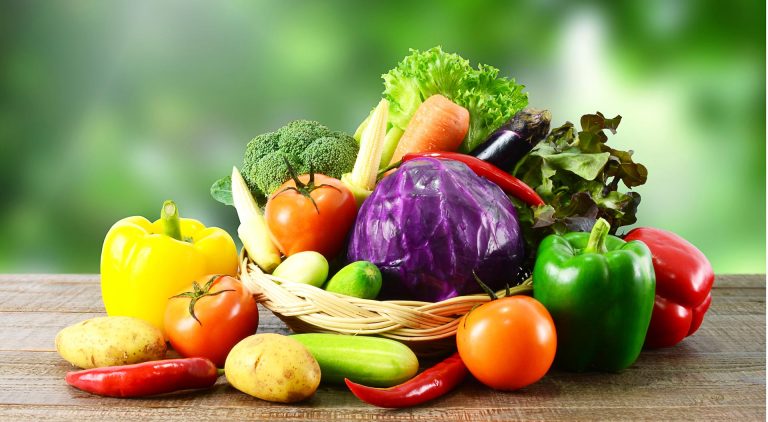
Before you begin this unit, be sure you have all the necessary items for the recipes you will be learning and the activities you will be doing. Remember to check your pantry for non-perishables and staples, such as spices and dry goods before you leave for the grocery store. Only you know how much food you can cook or eat in a given week, so use your best judgement to determine how much food to buy.
Next, you have to be sure you have all the necessary items for the recipes you will be learning. Remember to check your pantry for non-perishables and staples, such as spices and dry goods before you leave for the grocery store. You will want to be sure to have an array of vegetables on hand for this unit as well.
Create Your Shopping List
Kepp in mind that this unit focuses mostly on technique - there are not a lot of recipes to prepare. Everybody tackles these lessons and units slightly differently. you may progress at a different pace from unit to unit and you may choose to cook a variety of foods. Either way, you will need to learn how to shop for your specific needs.
Only buy the food you need, when you need it. Read ahead and see what the next tasks involve. A few minutes of planning will save you time and money. Besides, this kind of planning is an important skill to master in order to achieve long-term success in the kitchen
MOIST HEAT COOKING |
|
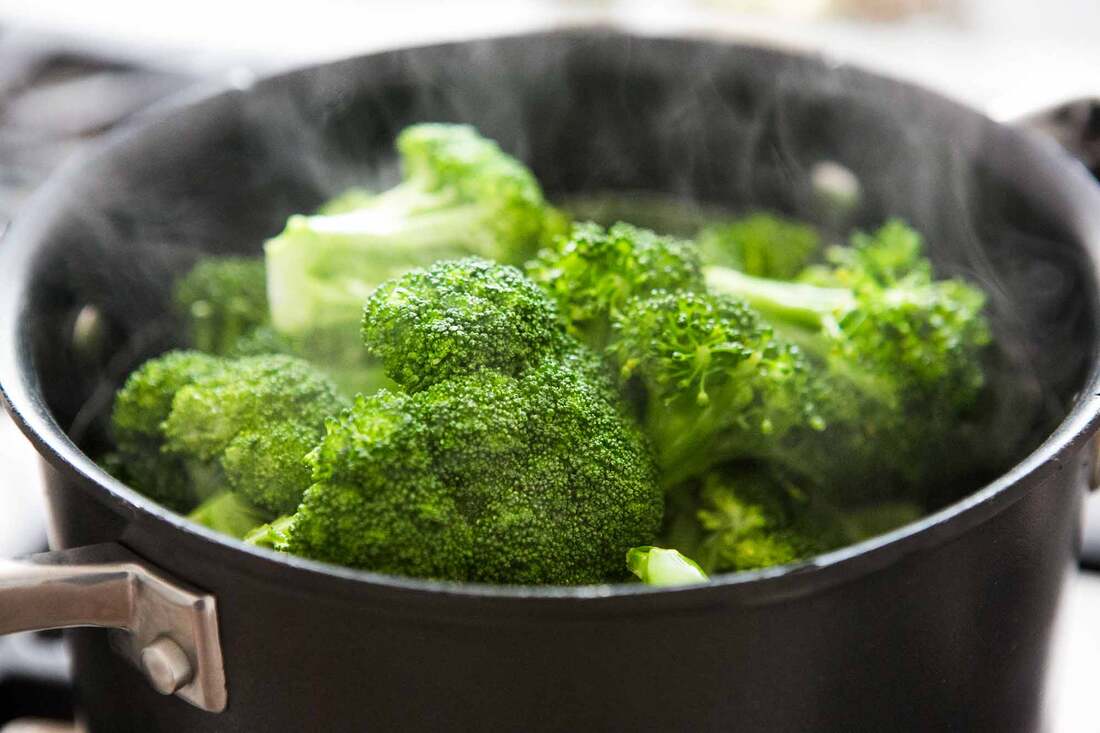
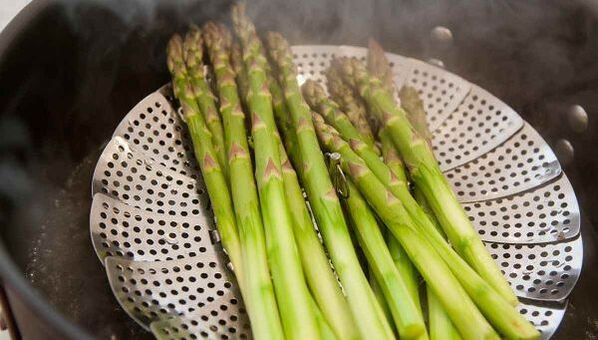
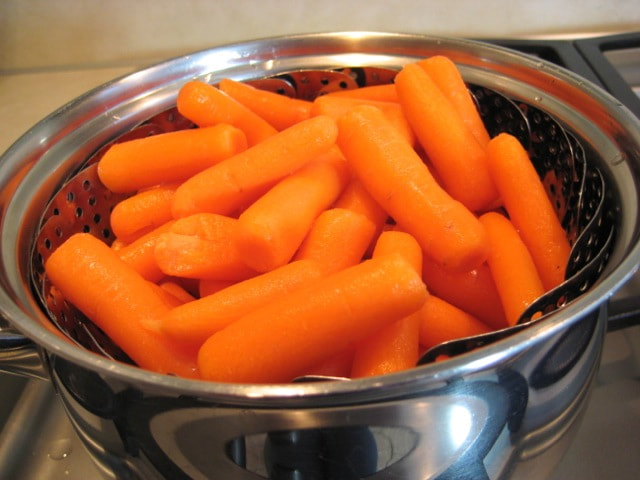
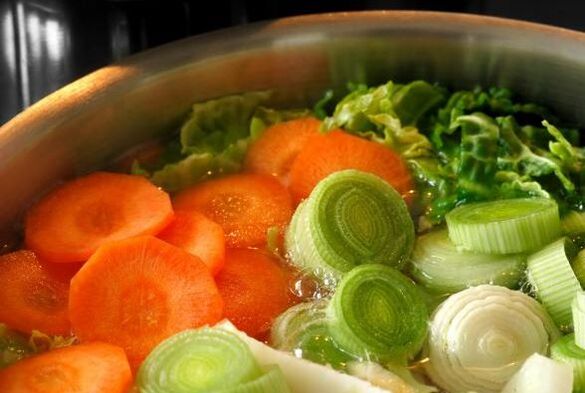
Steaming
Preserving Pigments Submersion |
There are many cooking methods that can be applied in the kitchen to help make your plant-based dishes taste amazing while retaining their vibrancy and nutrient value. Many of these cooking methods rely on moist-heat cooking, which is the focus of this unit. Moist-heat cooking is a foundational technique for preparing the many plant-based ingredients you will use in the CulinaryMD recipes.
This unit focuses primarily on steaming and submersion techniques. The submersion technique is important for preparing a variety of dishes, including soups and one-pot meals, and is essential for cooking whole grains and legumes. When done properly, these moist-heat cooking techniques also help retain the nutritional benefits of plant-based foods.
This unit focuses primarily on steaming and submersion techniques. The submersion technique is important for preparing a variety of dishes, including soups and one-pot meals, and is essential for cooking whole grains and legumes. When done properly, these moist-heat cooking techniques also help retain the nutritional benefits of plant-based foods.
STEAMING FUNDAMENTALS
Steaming is an ancient form of quick and healthy cooking, yet it is an often neglected cooking technique in the home and professional kitchens. Although steaming tends to be associated with bland institutional food, it shouldn't be. In fact, steaming is used in many different cultures by cooks who appreciate the delicate textures, true flavors, and versatility it provides.
It is uncommon to wrap food items with aromatic leaves, such as banana leaves or corn husks to impart aroma, and, therefore, delicate flavor. However, do keep in mind that if simmering water along is flavored with aromatics, the steam will impart relatively little flavor to the food item.
As long as you use fresh ingredients you can make tasty and satisfying food with little effort. Although the concept of steaming may seem rather simple, there are several essential steps that you need to follow in order to achieve the best results.
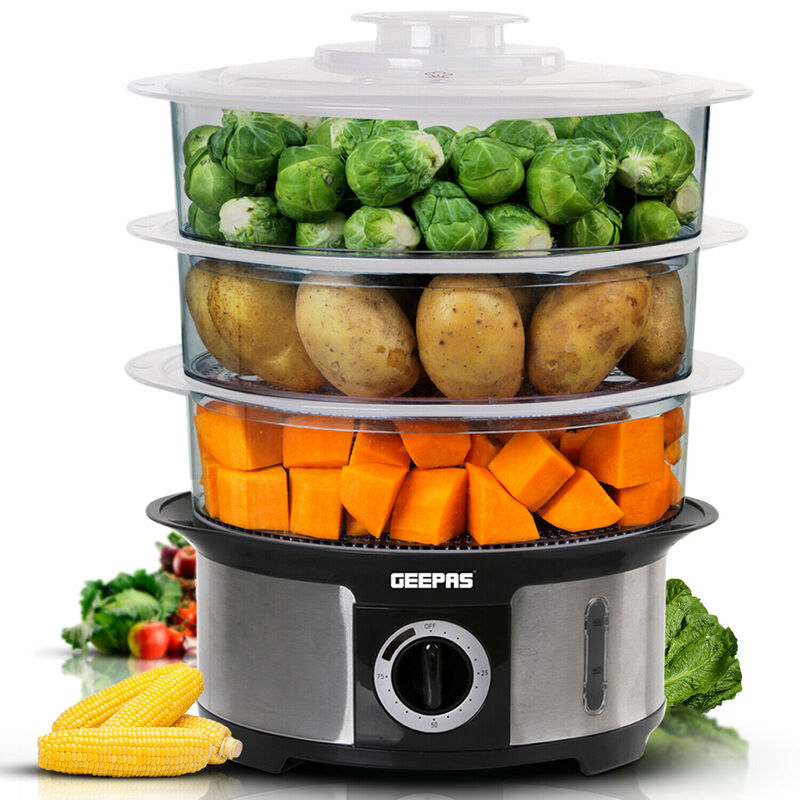
For this simple cooking method, all you need is a pot, a perforated rack, some simmering water an a tight-fitting lid. In this lesson you will learn about steaming and its advantages. You will also learn the basics of steaming from preparing ingredients and assembling them in the steaming vessel to controlling temperature. Finally, you will learn about the different kinds of available steaming tools.
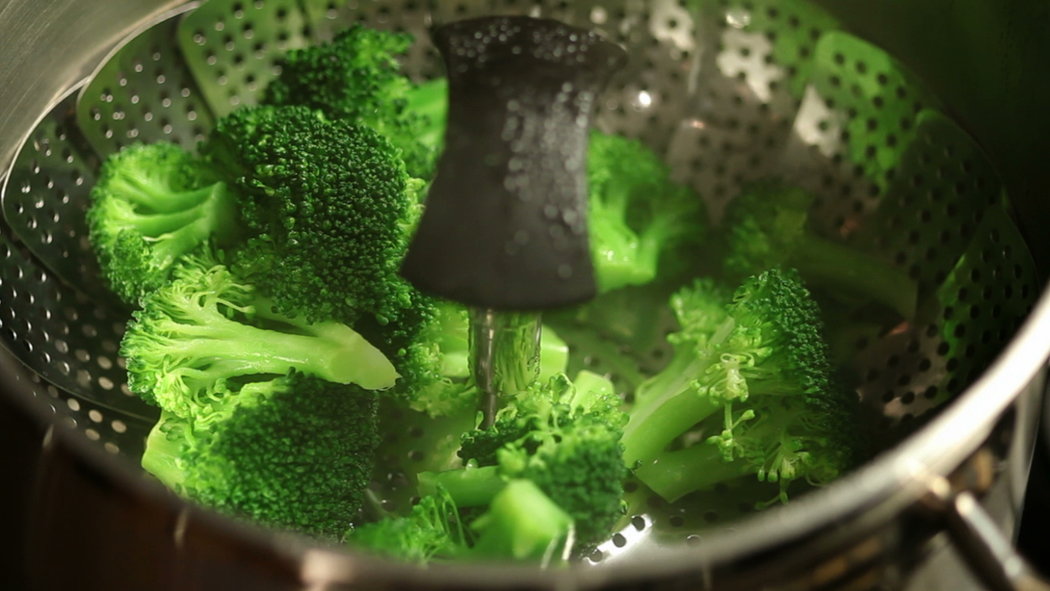
Steaming is an ideal cooking method for almost any vegetable. Not only does steaming help to retain most of the vegetable nutrients, it also helps to preserve its shape and vibrant color.
Steamed vegetables have the unfortunate reputation of being blunt and boring. However, with a bit creativity, they can easily become very interesting and tasty. In this lesson, you will learn how to prepare, steam and test vegetables for doneness. You will also learn how to finish and season vegetables in ways that will compliment their natural flavors. Finally, you will learn how to store steamed vegetables so you can quickly and easily incorporate them into other dishes throughout the week.
|
It is great to know that any vegetable can be steamed. No matter what vegetable you choose, it is important to understand that only the freshest and quality vegetables should be used for steaming. Compared to other method of cooking such as roasting, stir fry or grilling, steaming does not add flavor. It merely brings out flavor within the vegetable. Even if the liquid is very flavorful, the volatile oil released by the aromatics will apart only very little topical flavor. That's why it is important to use only the best ingredients. Steaming allows the pure, clean flavor of the vegetables to shine through.
|
|
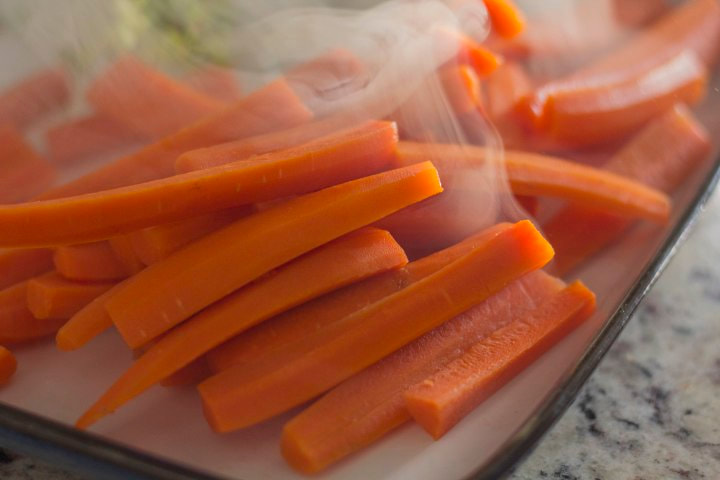
To prepare vegetables for steaming there's not much to do. Just make sure they are washed and peeled if necessary. For fast and even cooking, you have to make sure the vegetables are roughly the same size. For ingredients such as leafy greens, delicately leaves can be steamed whole. Harder greens such as collard greens should be torn or cut into pieces prior to steaming, this makes them easier to eat.
|
|
To steam vegetables, first prepare the steaming liquid and bring it to the simmer. Next, place the vegetables in a steaming basket preferably in a single layer. Make sure not to crowd or overload the basket. Otherwise, the vegetables will cook unevenly. Cover, and let steam. Note, depending on the size of the steamer, you may need to rotate the vegetables halfway to make sure they cook evenly. Vegetables can tolerate a more vigorous steam, so it is ok if the liquid beneath is simmering rather briskly. This will create more intense steam and encourage quicker cooking. Quick cooking helps to maintain the vegetables color and valuable nutrients.
|
|
Cooking time will vary depending on the size and type of the vegetable. Harder vegetables such as beets and carrots will obviously take longer to cook than softer vegetables such as broccoli or leafy greens. Also the age of the vegetable will affect the cooking time. For example, the young tender asparagus will take less time to cook than older thicker asparagus. If you are steaming more than one vegetable in the same basket, steam the harder vegetable first, and then add the softer vegetables part way through. Alternatively, you can stock another layer of vegetables according to their cooking times. During steaming, some vegetables will loose some of their chlorophyll pigment. This is because the a lid is used during cooking. When it comes to steaming certain vegetables, it is a small compromise between preserving nutrients over their color. But rest assured the vegetables will still be delicious.
|

|
Steamed vegetables should retain their natural shape and should be just cooked through and tender. Vegetables tend to cook very rapidly in steam. So over cooking them is a common mistake. Timing your vegetables and cooking them to the required doneness simply becomes a matter of experience. In general, most bite size vegetables depending on their hardness takes between 5 to 7 minutes to steam. Give or take a couple of minutes. However, don't rely solely on cooking time as these are merely estimates. Make sure to taste the vegetable sooner rather than later to prevent overcooking them. To test the vegetables, simply insert the tip of your pairing knife into the center. If you are able to lift the vegetable and it does not slide off the knife, the vegetable is still raw in the middle. If the knife slides through and you can just barely lift the food off of the basket, the vegetable is properly cooked. If the knife slides in and out and you cannot lift it off of the basket, it is likely overcooked. It is also important to get into the habit of tasting the food as you cook to determine the proper doneness. Vegetables when steamed properly should be tender and offer resistance to the tooth. They should also maintain their vibrant color.
|


|
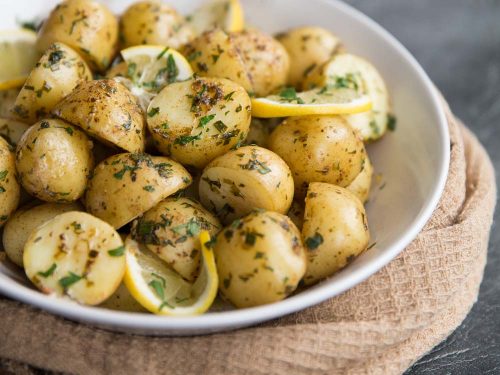
The simplest way to finish steamed vegetables is to transfer them to a bowl. Then lightly season them with your seasoning of choice, and then toss and serve. Steamed vegetables can also be finished in a variety of many other ways. Lemon juice will brighten the flavor of many vegetables. Also toasted spices or freshly chopped herbs will add burst of other flavors. The can also enhance the final presentation. Even the same ingredient can be finished in different ways to add variety to your meals. Example is potato. One portion can be tossed with green onions and parsley then other portion can be tossed with other ingredients of choice. Another easy way to take everyday vegetables to turn into something special is to add your favorite vinaigrette. Gently tossed the vegetables much like a salad. Tossing steamed vegetables with a vinaigrette is a great way to enhance their flavor. By also adding ingredients such as toasted nuts, seeds, or fresh herbs, you can easily create dish that started out rather simple and turn it into something healthy and delicious.
|
|
Vegetables can be steamed and stored for later use. They are best par-cooked to the point where they are still crunchy. To stop the cooking process, quickly cool the steamed vegetables in an ice bath. Drain and store in tightly sealed container in a refrigerator for 2-3 days. To serve, you will just need a quick re-steaming. To do this simply set up your steaming basket and steam until heated through and cooked to desired doneness. Season to taste. Alternatively, the vegetables can be added to stir fries or quickly sauted until heated through.
|
When preparing foods using moist techniques the process of flavor development is especially critical. Because moist-heat methods tend to diffuse (rather than concentrate) flavors, it is important to use post-cooking flavor development to layer and build bold flavors. In the case of steamed vegetables, this means that most of the addition of ingredients that will give the dish character and appeal.
Basic Method of Steaming Food
|
|
|
Unit Task 1
Prepare the following recipes, take photo of your Mise en place, steaming method and finished course.
Note: Use Submission button below to send completed tasks.
Note: Use Submission button below to send completed tasks.
|
|
INTRODUCTION TO VEGETABLE PIGMENTS
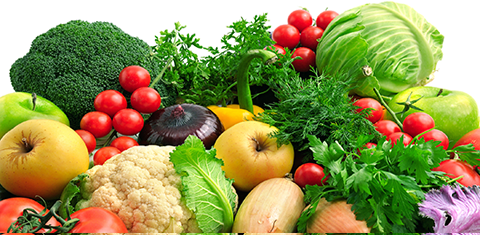
Vegetable come in a rainbow of colors, from beautiful white to vibrant green, bright orange and deep red due to the presence of certain pigments in their cells. In this lesson, you will learn about the different pigment categories and the things you need to keep in mind during cooking to preserve color in each pigment category, nutrition, and flavor.
Vegetable come in a rainbow of colors, from beautiful white to vibrant green, bright orange and deep red due to the presence of certain pigments in their cells. In this lesson, you will learn about the different pigment categories and the things you need to keep in mind during cooking to preserve color in each pigment category, nutrition, and flavor.
Vegetable Pigments can be classified in three categories:
- Chlorophyll
- Carotene
- Flavonoids
Chlorophyll
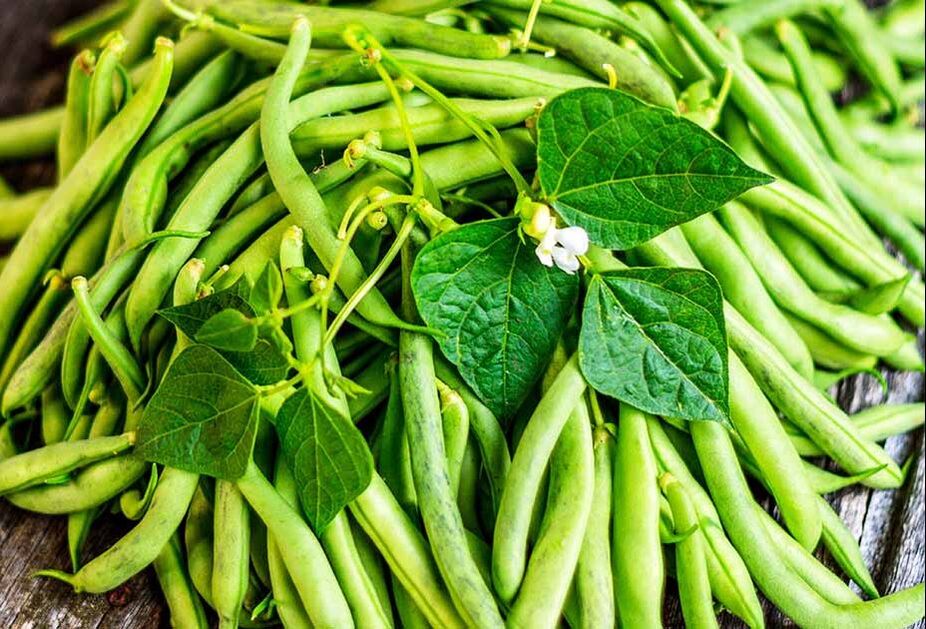
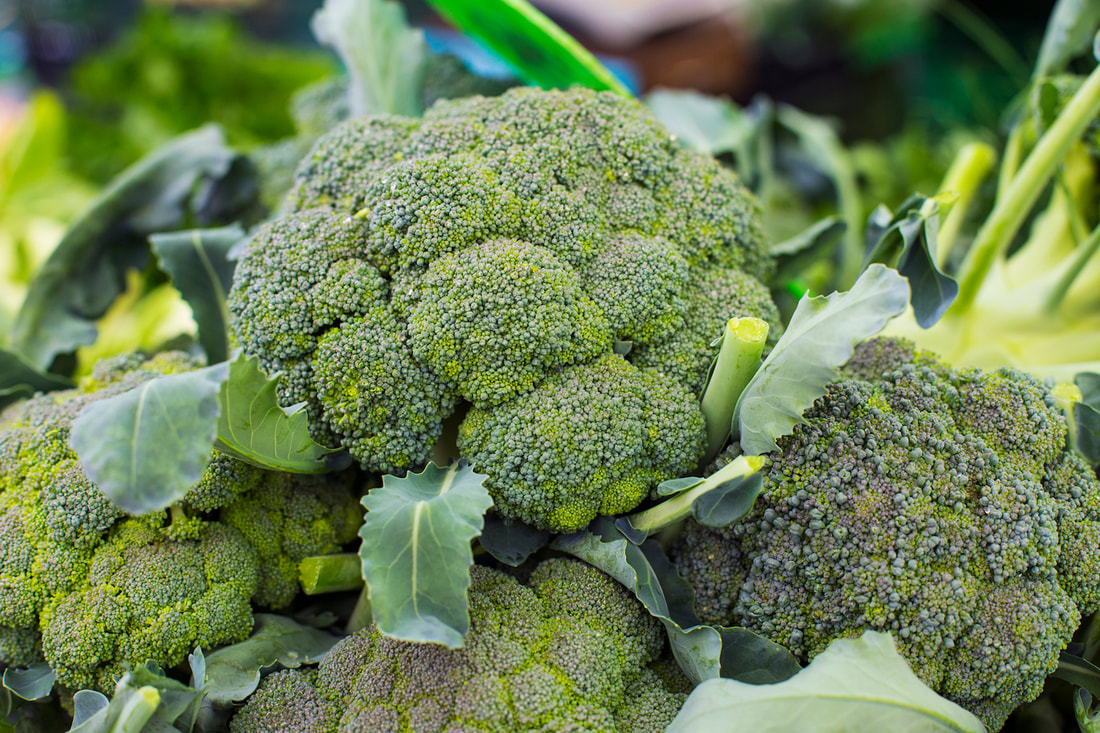
Green vegetables such as broccoli, asparagus and green beans contain the pigment chlorophyll. Chlorophyll is very sensitive to heat and acids. If thrown briefly into boiling water, it will become vibrant and bright. However with prolonged cooking it will suffer from major color loss. Also if green vegetables are cooked with an acid such as lemon juice or vinegar it will quickly turn from bright green to a dull olive green color. Green vegetables do contain a small amount of natural acid that will leech out during cooking. So plenty of water will help dilute the acids and keep the color vibrant. It is also important to cook green vegetables without a lid so the acids do not condensate into the lid and pool back into the cooking liquid. If you are finishing vegetables with acidic vinaigrette or sauce it is best to do this immediately prior to serving to prevent the color from changing. You can see after few minutes that the color of the vegetables will change and loose their vibrant color. Note: many sources indicate to cook green vegetables in rapidly boiling salted water in order to keep them green. While it is true, it the quick cooking time that maintains the bright color and not simply the salt. The salt does speed up the cooking process but it mostly seasoned the vegetables as they cook.
Green vegetables such as broccoli, asparagus and green beans contain the pigment chlorophyll. Chlorophyll is very sensitive to heat and acids. If thrown briefly into boiling water, it will become vibrant and bright. However with prolonged cooking it will suffer from major color loss. Also if green vegetables are cooked with an acid such as lemon juice or vinegar it will quickly turn from bright green to a dull olive green color. Green vegetables do contain a small amount of natural acid that will leech out during cooking. So plenty of water will help dilute the acids and keep the color vibrant. It is also important to cook green vegetables without a lid so the acids do not condensate into the lid and pool back into the cooking liquid. If you are finishing vegetables with acidic vinaigrette or sauce it is best to do this immediately prior to serving to prevent the color from changing. You can see after few minutes that the color of the vegetables will change and loose their vibrant color. Note: many sources indicate to cook green vegetables in rapidly boiling salted water in order to keep them green. While it is true, it the quick cooking time that maintains the bright color and not simply the salt. The salt does speed up the cooking process but it mostly seasoned the vegetables as they cook.
|

|
|
Flavonoids
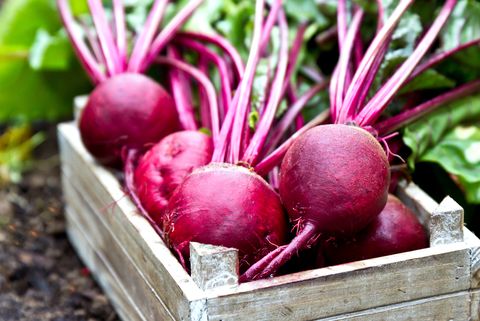
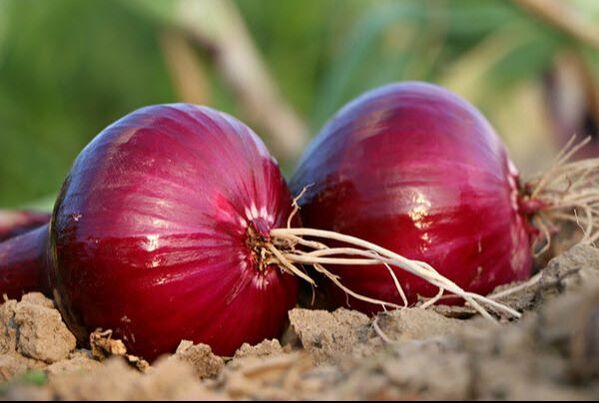
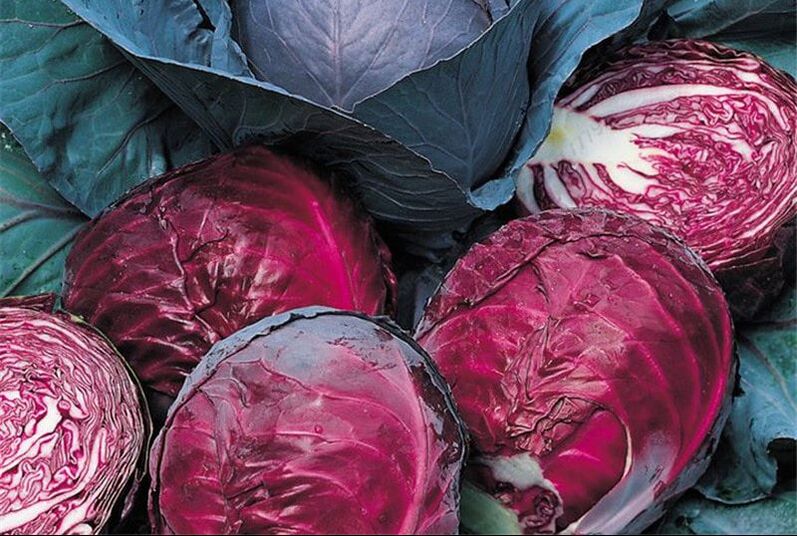
Red and white vegetables contains various flavonoids pigment. These range from red and purple fruits and vegetables, such as blue berries, red cabbage, red onions and red beets. To white fruits and vegetables, these pigments generally require the presence of acid in order to preserve their color. Approximately 1-2 tablespoons of acid per liter. Adding some vinegar to simmering vegetables will help them keep their pigment from leaching out. Also, when cooking different colored vegetables that leech color, it is important to cook them separately in order to maintain their individual colors. It is also a good idea to wear gloves when working with vegetables that leach colors as they will stain your hands and anything they came into contact with. For white pigmented vegetable like cauliflower, adding an acid such as lemon will help keep them white during cooking. Since all of these pigments benefits in an addition of an acid, they do not mind being cooked with a lid. In summary if you are looking to preserve color with these types of pigment. it is best to use an acid when cooking.
Red and white vegetables contains various flavonoids pigment. These range from red and purple fruits and vegetables, such as blue berries, red cabbage, red onions and red beets. To white fruits and vegetables, these pigments generally require the presence of acid in order to preserve their color. Approximately 1-2 tablespoons of acid per liter. Adding some vinegar to simmering vegetables will help them keep their pigment from leaching out. Also, when cooking different colored vegetables that leech color, it is important to cook them separately in order to maintain their individual colors. It is also a good idea to wear gloves when working with vegetables that leach colors as they will stain your hands and anything they came into contact with. For white pigmented vegetable like cauliflower, adding an acid such as lemon will help keep them white during cooking. Since all of these pigments benefits in an addition of an acid, they do not mind being cooked with a lid. In summary if you are looking to preserve color with these types of pigment. it is best to use an acid when cooking.
|
|
|
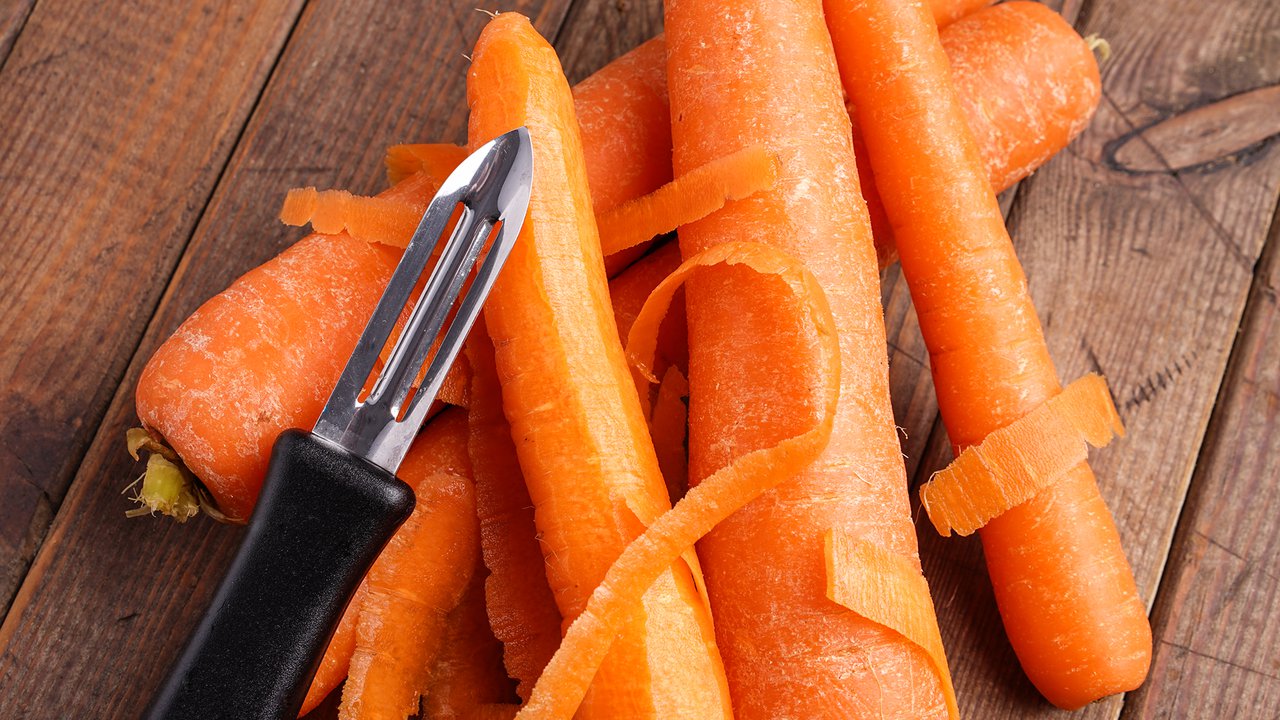
Carotenoids
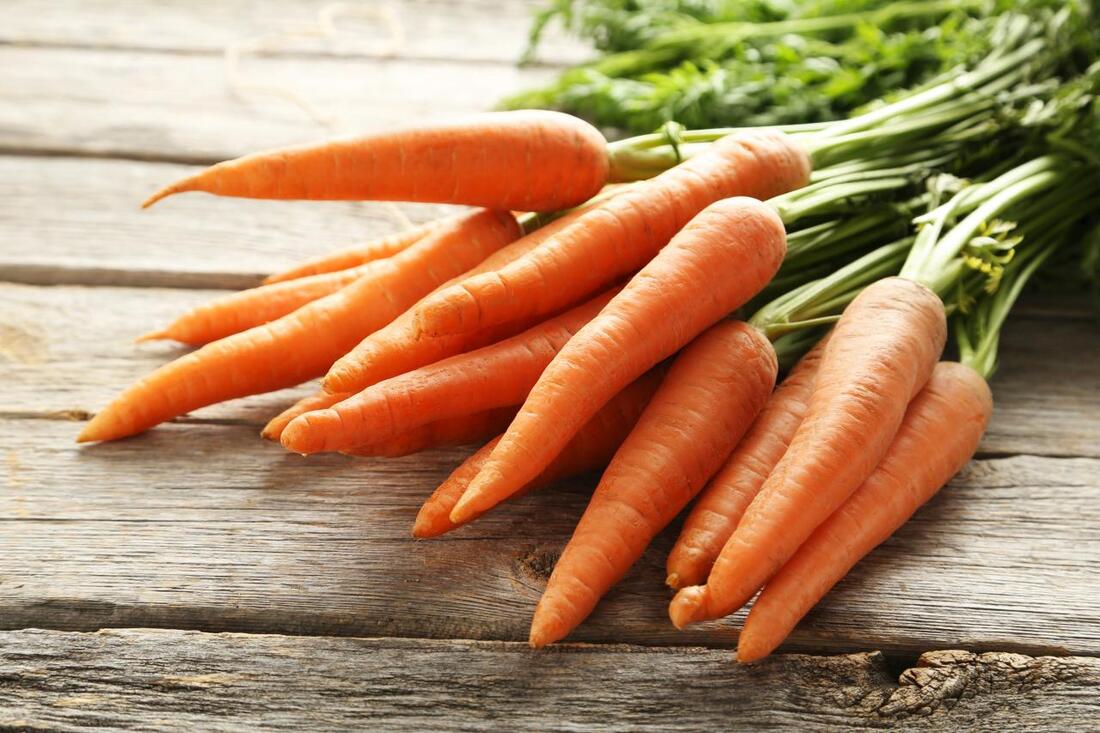
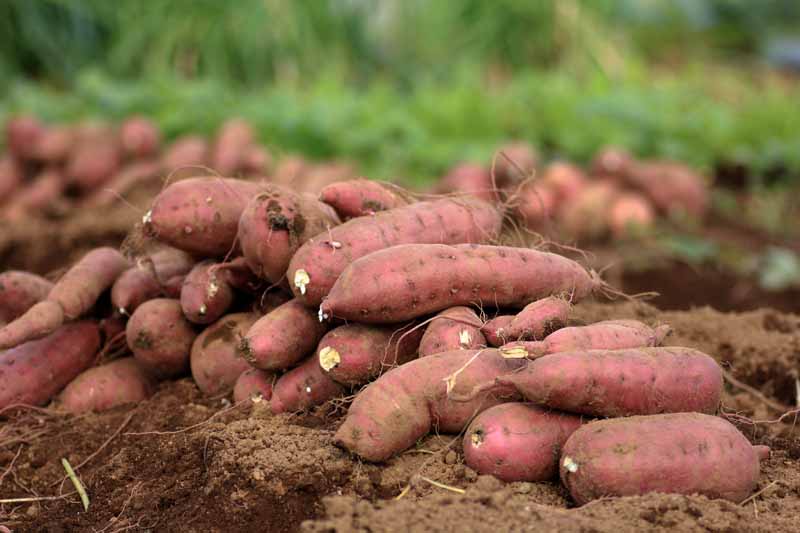
Orange and yellow vegetables such as carrots, sweet potato and squash contain the pigment carotene. This pigment is very stable and can generally tolerate any method of cooking. Whether with an acid or not or whether with or without a lid. if adding an acid, it is recommended to add it half way through. As acids tends to keep vegetables firm. Adding it half way through will allow the vegetable to become tender while still preserving its color.
Orange and yellow vegetables such as carrots, sweet potato and squash contain the pigment carotene. This pigment is very stable and can generally tolerate any method of cooking. Whether with an acid or not or whether with or without a lid. if adding an acid, it is recommended to add it half way through. As acids tends to keep vegetables firm. Adding it half way through will allow the vegetable to become tender while still preserving its color.

|
|
|
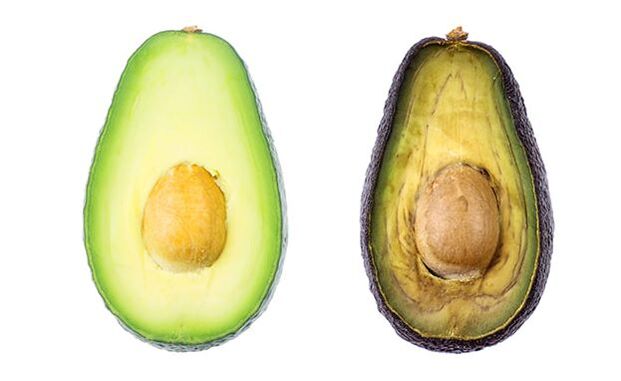
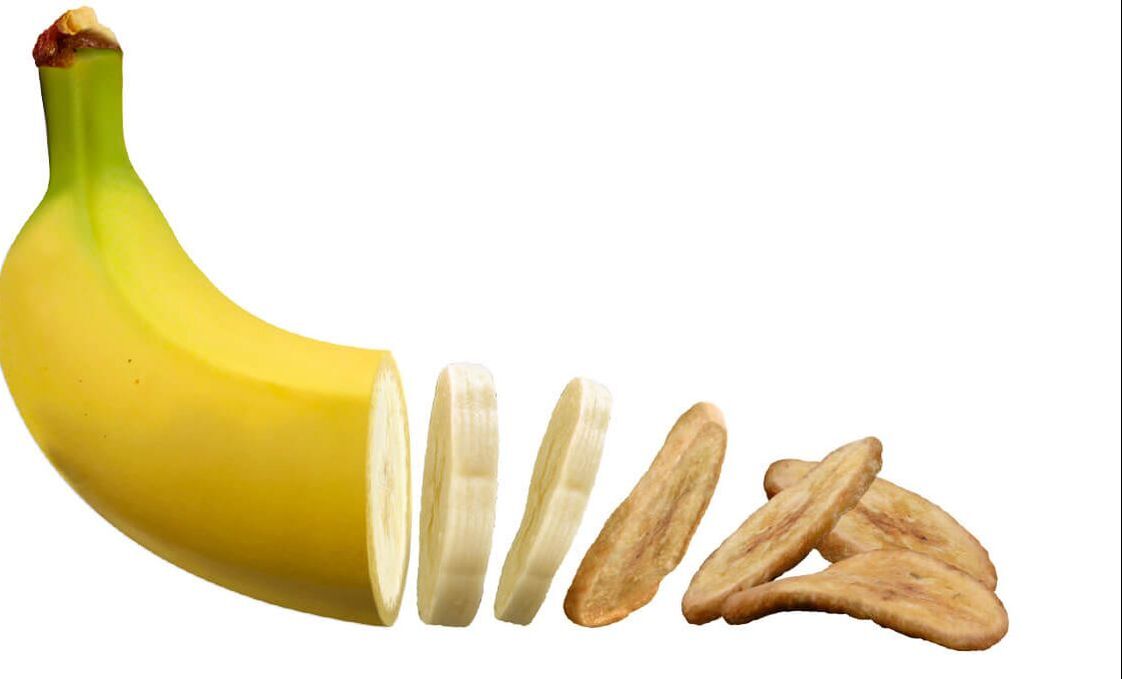
Enzymatic browning
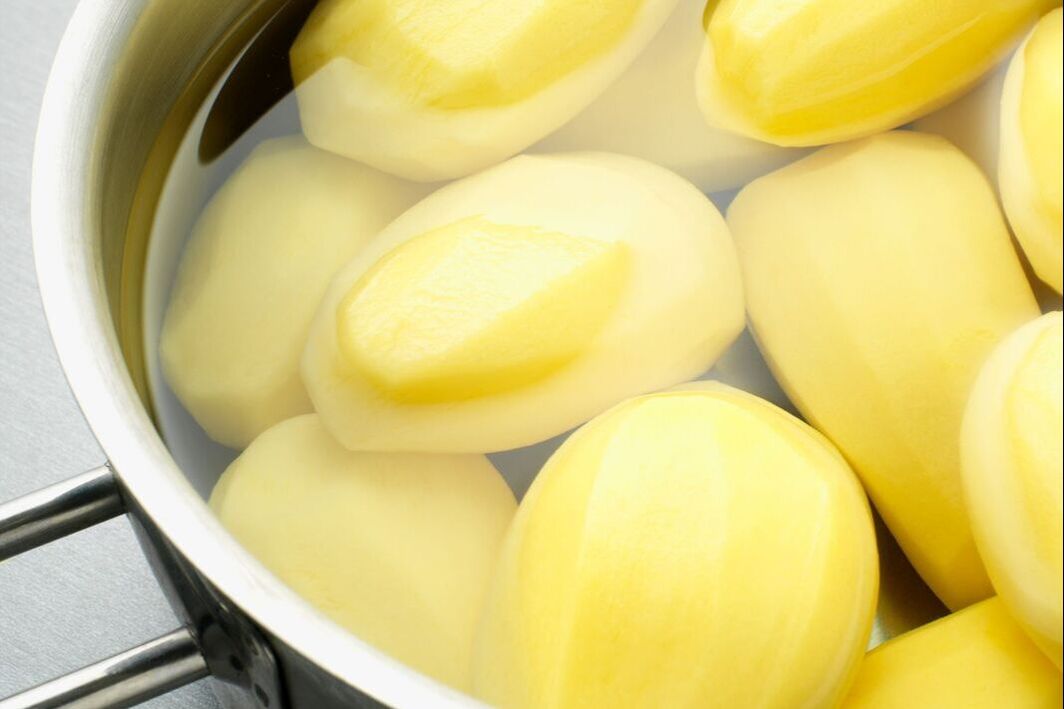
This happens to with apples, bananas, avocadoes, and potato. This occurs when the cells of the vegetables are bruised or cut. The expose cells oxidize and discolor. To discourage this, the simplest method is to coat the ingredient with lemon or lime juice, or place the ingredient into a acidulated water. In the case of potatoes, they simply need to be submerged in water to minimize their exposure to oxygen.
This happens to with apples, bananas, avocadoes, and potato. This occurs when the cells of the vegetables are bruised or cut. The expose cells oxidize and discolor. To discourage this, the simplest method is to coat the ingredient with lemon or lime juice, or place the ingredient into a acidulated water. In the case of potatoes, they simply need to be submerged in water to minimize their exposure to oxygen.
|
|

|
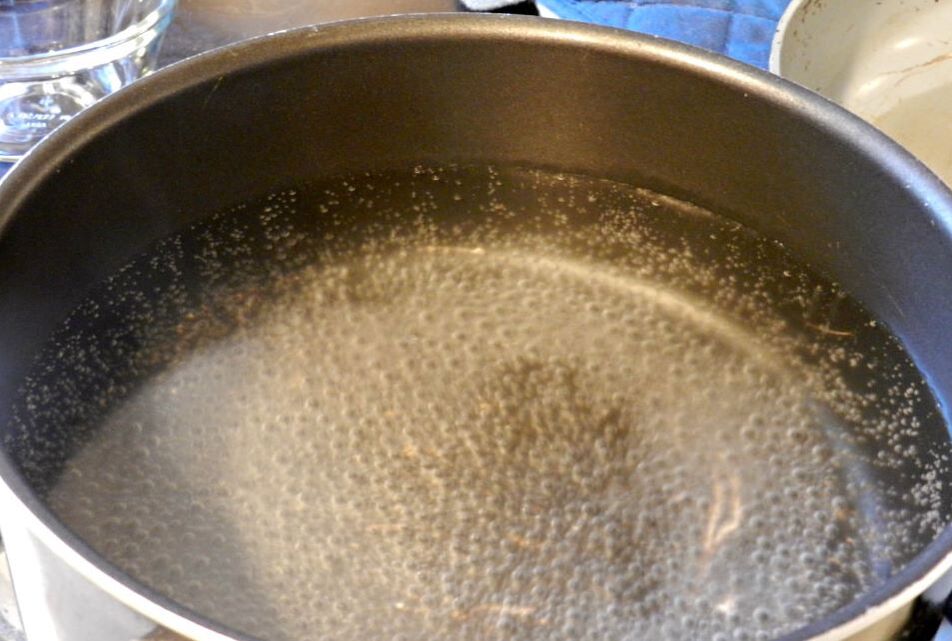
SUBMERSION COOKING METHODS
Poaching, simmering or boiling are moist-heat cooking methods that involve submerging the ingredients in hot liquids to cook them. Most people think that submersion cooking is as simple as placing ingredients in a liquid and then waiting until they are done, but the temperature of the liquid in which the ingredients are cooked will dramatically affect the final outcome.
Poaching, simmering or boiling are moist-heat cooking methods that involve submerging the ingredients in hot liquids to cook them. Most people think that submersion cooking is as simple as placing ingredients in a liquid and then waiting until they are done, but the temperature of the liquid in which the ingredients are cooked will dramatically affect the final outcome.
In this lesson, you will learn about poaching, simmering and boiling and how to identify each of these submersion temperatures. The main difference between each of these methods is the temperature of the liquid, which only varies by about 30 degrees centigrade. However, within this temperature range, the food you cook is affected in very different ways.
While these methods may seem simple, understanding the key differences between them, and knowing when and how to use them is vital in maintaining the integrity of the ingredients that you cook. These methods will not only teach you the art of patience but also the secrets of good cooking.
While these methods may seem simple, understanding the key differences between them, and knowing when and how to use them is vital in maintaining the integrity of the ingredients that you cook. These methods will not only teach you the art of patience but also the secrets of good cooking.
To identify each submersion temperature try to monitor the activity of the water by adding diced carrots once the liquid is between a 160 and 180 degrees farenheit you will have reached the poaching temperature range. To visually identify the poaching temperature range, observe the water barely moving with very tiny bubbles at the bottom of the pot that may seldom rise to the top surface. Another key visual is the first sign of steam between a 195 to 205 degrees you will reach the simmering temperature range. To visually identify this temperature range, the water should be more turbulent as indicated by the increase movement of the carrots. Also the bubbles are a bit bigger and rise to the surface more frequently. In the simmering range you should start to hear water activity and see a bit more steam. As you near the boiling point you will observe increased activity, this is referred to as the gentle boil. It's more intense than simmering but not as rapid as a full boil. Finally at 212 degrees you will have reached the boiling point. To visually identify this temperature, large bubbles violently breaks through the water surface as indicated by the rapidly bubbling carrots. Each temperature gives different results. So learning how to recognize and controlling temperature is key when cooking foods in liquids.
POACHING
Poaching is the gentlest of the moist heat submersion cooking methods. When poaching, food is fully submerged in the liquid and cooked between 160-180 degrees farenheit. Poaching can be a very healthy way to cook delicate items. The gentle cooking process ensures moisture is retained. Poaching also allows some of the cooking liquid to be absorbed into the food. This is why it is important to use a flavorful liquid as the food will absorb some of this flavors. You can use almost any liquid to poach. Just make sure the poaching liquid is brought to the proper poaching temperature before the food is added. Also be sure the food is completely submerged, otherwise it will not cook evenly. It's good to know that poaching is not ideal for most vegetables as they would take too long to cook at this temperature. As a result they can become waterlogged by the time they're fully cooked.
Poaching is the gentlest of the moist heat submersion cooking methods. When poaching, food is fully submerged in the liquid and cooked between 160-180 degrees farenheit. Poaching can be a very healthy way to cook delicate items. The gentle cooking process ensures moisture is retained. Poaching also allows some of the cooking liquid to be absorbed into the food. This is why it is important to use a flavorful liquid as the food will absorb some of this flavors. You can use almost any liquid to poach. Just make sure the poaching liquid is brought to the proper poaching temperature before the food is added. Also be sure the food is completely submerged, otherwise it will not cook evenly. It's good to know that poaching is not ideal for most vegetables as they would take too long to cook at this temperature. As a result they can become waterlogged by the time they're fully cooked.
SIMMERING
Simmering is a moist heat submersion cooking where food is fully submerged in a liquid and cooked between a 195 to 205 degrees farenheit. Simmering is the most common moist heat cooking method. it is an efficient, yet gentle method in which to cook things evenly. It is also ideal for dishes that required longer cooking time such as soups and stocks as it will dry off ingredients as they slowly cook.
Simmering is a moist heat submersion cooking where food is fully submerged in a liquid and cooked between a 195 to 205 degrees farenheit. Simmering is the most common moist heat cooking method. it is an efficient, yet gentle method in which to cook things evenly. It is also ideal for dishes that required longer cooking time such as soups and stocks as it will dry off ingredients as they slowly cook.
BOILING
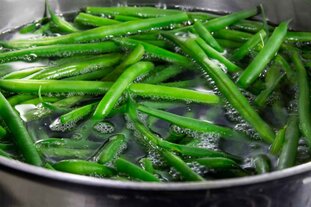
Boiling is a moist heat submersion cooking method where food is fully submerged in a liquid and cooked at 212 degrees farenheit. Liquid at a full or rolling boil will continually move the food around. A gently boil is less turbulent and more appropriate for delicate item such as hand made ravioli. If cooked at a rolling boil they will likely break apart. Boiling is most suitable for cooking dry, starchy ingredients such as pasta, rice and grains. You don't have to worry of moisture loss as you do with proteins. In this case you are essentially rehydrating the food. The rapidly boiling liquid is needing to keep the ingredients moving so they don't stick together. Boiling is also used for blanching many vegetables. Also, many dishes are first brought to a boil before being turned down to a simmer. This simply brings them to the proper simmering temperature a bit quicker. Boiling also kills bacteria which is why food safety standards dictate that foods be brought to the boiling point while reheating. In most of these cases however, foods are brought to a brief amount of time. Aside from cooking pasta or grains, prolonged boiling is almost never recommended as it can damage the texture and flavor of the ingredients.
Boiling is a moist heat submersion cooking method where food is fully submerged in a liquid and cooked at 212 degrees farenheit. Liquid at a full or rolling boil will continually move the food around. A gently boil is less turbulent and more appropriate for delicate item such as hand made ravioli. If cooked at a rolling boil they will likely break apart. Boiling is most suitable for cooking dry, starchy ingredients such as pasta, rice and grains. You don't have to worry of moisture loss as you do with proteins. In this case you are essentially rehydrating the food. The rapidly boiling liquid is needing to keep the ingredients moving so they don't stick together. Boiling is also used for blanching many vegetables. Also, many dishes are first brought to a boil before being turned down to a simmer. This simply brings them to the proper simmering temperature a bit quicker. Boiling also kills bacteria which is why food safety standards dictate that foods be brought to the boiling point while reheating. In most of these cases however, foods are brought to a brief amount of time. Aside from cooking pasta or grains, prolonged boiling is almost never recommended as it can damage the texture and flavor of the ingredients.
|
|
SUBMERSION COOKING
|
COOKING VEGETABLES IN WATER
Properly cooked vegetables are hard to come by. They're either too crunchy or terribly overcooked. When cooking vegetables, the main objective is to preserve the flavor and color while achieving the desired texture. In this lesson, you will learn the basics of vegetable cookery. Understanding the differences between boiling, simmering, blanching and parboiling are important. By knowing just a few simple techniques you will never have to suffer through those over or undercooked vegetables again.
Properly cooked vegetables are hard to come by. They're either too crunchy or terribly overcooked. When cooking vegetables, the main objective is to preserve the flavor and color while achieving the desired texture. In this lesson, you will learn the basics of vegetable cookery. Understanding the differences between boiling, simmering, blanching and parboiling are important. By knowing just a few simple techniques you will never have to suffer through those over or undercooked vegetables again.
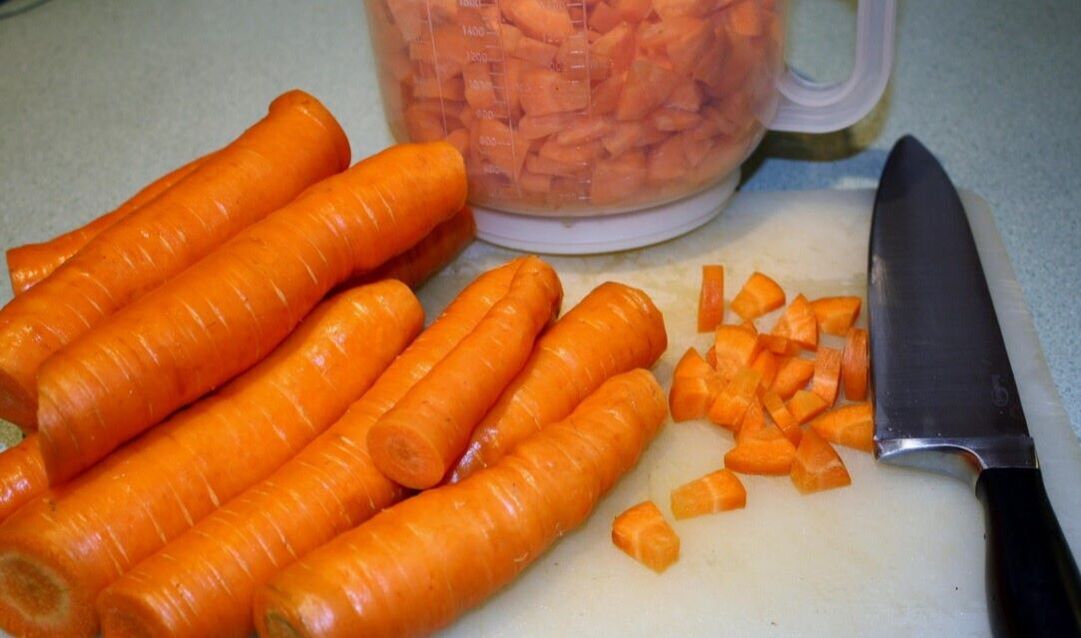
To prepare vegetables for cooking, you have a suitable size pot for the amount of vegetable you are cooking. The vegetable should have enough room to move about the pot and not be crowded. Depending on the vegetable you are cooking and the pigment category comes from, you may also want to add acid of some sort to maintain the natural color. Lastly it is important to cut the vegetables into uniform size pieces so they cook at the same rate.
Boiled and simmered vegetables are vegetables that are cooked to the just tender state. To determine whether or not the vegetables should be boiled or simmered will depend on the type of vegetable and the amount of cooking time required to bring it to just tender state. For most vegetables, quick cooking in boiling water is required to preserve the flavor and color of the vegetable and to produce the desired texture. However, vegetables that are starchy such as potatoes are best cooked to the simmer. Turbulent water will cause the outside to disintegrate before the inside has had time to cook through. Long cooking vegetables such as beans are also best cooked at a simmer. Delicate vegetables also benefit from being simmered. Simmering water prevents the vegetables from banging into each other and falling apart. Also, remember when cooking green vegetables, you generally do not want to cover them with a lid as this will allow the natural acids to escape. Testing vegetables for doneness could be tricky because every vegetable cook at a different rate. Therefore you should check for doneness periodically and far and advance when you think they are done. For many vegetables simply taste them. When cooked properly they should offer little resistance to the tooth. Keep in mind that the heat within the vegetable will continue to cook it so you need to move quickly once they're done especially with more delicate or green vegetables. Green vegetables will go from perfectly cooked to overcooked in a matter of seconds leaving them dull and mushy. You can see the drastic difference with the texture even when the cooking time vary by just few minutes. To test harder vegetables such as beets and potatoes, use a knife. You should feel resistance all the way through and they should easily slide off the knife. Another was to test the potatoes is to mash them with a fork. if they mash easily they're done. Vegetables can be finished in many ways, from fresh herbs to simple vinaigrettes. It's good to know that hot vegetables and ready for serving will not hold for long periods of time. They will become mushy and gradually loose their color and texture if not served immediately.
BLANCHED AND PARBLOIED VEGETABLES
Blanched and parboiled vegetables are vegetables that are partially cooked. Often the words are used interchangeably however they are not technically the same thing. Blanched and parboil use the same process of boiling. For blanched vegetables, they are cooked very briefly just pass the stage, this helps bring out the flavor and vibrant color. For instance this technique is often used when making crudité. Parboil or parcooked vegetables are cooked longer than blanched vegetables. Paboiled vegetables are cooked at almost al dente stage, meaning they offer some resistance. Whether blanching or parboiling, vegetables are usually shocked in an ice bath to stop the cooking process and preserve their color. Once the vegetables are completely cool they must be removed so they do not become waterlogged. Blanching and parboiling are great methods when preparing mis en place. Depending on the vegetables, it can be prepared hours, even days in advance and then refrigerated. Once you're ready to serve, the vegetables can be finished in a variety of ways. They can be reheated by plunging them briefly into boiling water, steam or even quickly sauted. Don't get too hang up whether or not you want to blanch or parboiled, these are terms that could turn around quite loosely. Just think about how far you want to cook the vegetables in advance and how much time it will take to finish the dish when it comes to serving them
Blanched and parboiled vegetables are vegetables that are partially cooked. Often the words are used interchangeably however they are not technically the same thing. Blanched and parboil use the same process of boiling. For blanched vegetables, they are cooked very briefly just pass the stage, this helps bring out the flavor and vibrant color. For instance this technique is often used when making crudité. Parboil or parcooked vegetables are cooked longer than blanched vegetables. Paboiled vegetables are cooked at almost al dente stage, meaning they offer some resistance. Whether blanching or parboiling, vegetables are usually shocked in an ice bath to stop the cooking process and preserve their color. Once the vegetables are completely cool they must be removed so they do not become waterlogged. Blanching and parboiling are great methods when preparing mis en place. Depending on the vegetables, it can be prepared hours, even days in advance and then refrigerated. Once you're ready to serve, the vegetables can be finished in a variety of ways. They can be reheated by plunging them briefly into boiling water, steam or even quickly sauted. Don't get too hang up whether or not you want to blanch or parboiled, these are terms that could turn around quite loosely. Just think about how far you want to cook the vegetables in advance and how much time it will take to finish the dish when it comes to serving them
|
|
|
FROZEN VEGETABLES
Frozen vegetables often get a bad reputation because people believed that they are not as nutritious as fresh vegetables. It is true when fresh vegetables were in season they are the preferred choice. However for shipping purposes, they're often picked before they are fully ripened. Frozen vegetables on the other hand are generally packaged on the peak of ripeness. Therefore, when buying vegetables that are out of season, frozen vegetables are often the way to go as they generally contain more vitamins and minerals. Cooking vegetables from frozen is basically the same as boiling or simmering. If not overcooked, frozen vegetables can be every bit as flavorful as fresh vegetables.
Frozen vegetables often get a bad reputation because people believed that they are not as nutritious as fresh vegetables. It is true when fresh vegetables were in season they are the preferred choice. However for shipping purposes, they're often picked before they are fully ripened. Frozen vegetables on the other hand are generally packaged on the peak of ripeness. Therefore, when buying vegetables that are out of season, frozen vegetables are often the way to go as they generally contain more vitamins and minerals. Cooking vegetables from frozen is basically the same as boiling or simmering. If not overcooked, frozen vegetables can be every bit as flavorful as fresh vegetables.
|
|
COOKING VEGETABLES IN WATER
|
Unit task
Here's a great exercise now that you've had a chance to view the videos on blanching and parboiling. For this one, in addition to parboiling broccoli, we'd also like you to submit your observations and analysis in writing. Please be thorough to demonstrate your grasp of the content, yet concise as to clearly articulate your findings.
To prepare the broccoli:
Photo 1:
Mise en Place. Submit a photo of your uniformly cut up broccoli. Be sure your broccoli is cut and laid out clearly, not stacked in a pile or bowl. Take this photo prior to submersion.
Photo 2:
Texture. Submit a photo of the three differently cooked pieces of broccoli, replicating the picture above, showing the clear difference in cooking times. Note, be sure that the broccoli is consistent in size and cut in half lengthwise to show the differences.
Note: Use the Submission button below to send completed tasks.
- Bring a small pot of water to a boil and season with salt.
- Cut a head of broccoli into small, evenly sized florets.
- Add the broccoli to the boiling water.
- Cook the broccoli for about a minute. Remove approximately 1/3 of the broccoli, shock it in ice water, drain and set aside. This corresponds to blanching.
- Let the broccoli continue to cook. Remove 1/2 of the remaining broccoli, shock it in ice water, drain and set aside. This corresponds to parboiling.
- Let the last portion of broccoli cook until it's just tender (that is, as you would want to serve it). Remove from the pot, shock it in ice water, drain and set aside.
- Submit photos of the before and after, along with your observations of the task and differences in the field below.
Photo 1:
Mise en Place. Submit a photo of your uniformly cut up broccoli. Be sure your broccoli is cut and laid out clearly, not stacked in a pile or bowl. Take this photo prior to submersion.
Photo 2:
Texture. Submit a photo of the three differently cooked pieces of broccoli, replicating the picture above, showing the clear difference in cooking times. Note, be sure that the broccoli is consistent in size and cut in half lengthwise to show the differences.
Note: Use the Submission button below to send completed tasks.
DRY HEAT COOKING |
|
Sauté
Pan tossing Caramelizing Roasting |
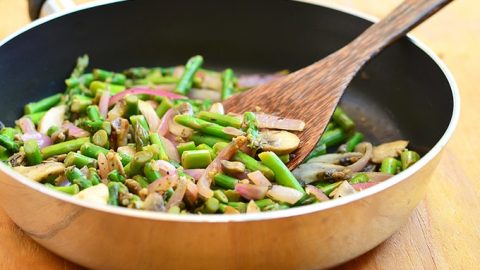
HOW TO SAUTE WITHOUT OIL
A classic sauté uses oil to caramelize the food item being cooked. No-oil sauté produces similar results. Like a classic sauté it uses high heat and movement to caramelize the food, but without the addition of oil. Learning how to sauté without the use of oil is an essential skill to have when you take plant-based approach to food preparation.
A classic sauté uses oil to caramelize the food item being cooked. No-oil sauté produces similar results. Like a classic sauté it uses high heat and movement to caramelize the food, but without the addition of oil. Learning how to sauté without the use of oil is an essential skill to have when you take plant-based approach to food preparation.
Building flavor is an important step in the cooking process, and most recipes that used dry heat cooking techniques build flavor from the start of the dish. But, this is where many oil-free recipes miss the mark on flavor. In fact, you may have encountered no oil recipes that have you begin, for instance, by cooking onions and water in a pan until the water has evaporated. As you know from previous lessons, when you cook and ingredient, such as onions, in a flavorless liquid until it evaporates, the flavor will not develop.
In this lesson, you will learn how to build flavor in a saute using proper pan heating and tossing techniques without the use of oil. Your oil-free cooking will never again lack flavor and finesse!
In this lesson, you will learn how to build flavor in a saute using proper pan heating and tossing techniques without the use of oil. Your oil-free cooking will never again lack flavor and finesse!
NO OIL SAUTE
Before you begin the lesson it is essential to know how to properly heat a pan. Am important thing to keep in mind is that foods will not brown, color or caramelized in the presence of too much moisture. If you want to achieve color, start by cooking the vegetables in a dry pan as this will begin the caramelization process. Once you achieve the desired coloration then add your liquid.
How to tell when your stainless steel frying pan is hot enough?
The water test is great for checking to see if the pan has reached the proper temperature for pan frying, sautéing or no oil cooking. Give it a try. If you don't heat your pan properly before adding ingredients, food will most likely stick. Please note, the water test only works on stainless steel pans.
As the pan heats up will add about 8th of a teaspoon of water every 10 to 15 seconds. As you can see if the pan is cold the water will not do anything. But as the pan heats up the water will start to steam and then eventually bubble. As it continues to heat it will steam and bubble even quicker. Soon the bubbles to evaporate as soon as the water heats the pan. Eventually when the water is added it starts to evaporate and disburse as smaller beads of water. As the pan reach the proper temperature it will start to form a ball, almost like a mercury ball that floats on the surface. If there's still many balls, wipe the pan dry with a few more seconds and try again. When the pan is at the proper temperature the mercury like bowl will form almost immediately with no or very few smaller balls of water. If the water spurts immediately and disburse quickly it is an indicator that the pan is too hot. Allow the pan to cool slightly and continue with the water test until you reach the mercury ball stage. As soon as you reach this stage, your pan is in the perfect temperature to proceed.
What Happens When You Properly Heat a Pan
Lets break it down to what actually happens when you heat up a pan. Heating your pan to proper temperature is the first and most important step in no-oil sautéing. As the pan heats, the molecules begin to expand and move in all directions. This movement causes the pores of the metal to open and close. Try to use the pepper corns to simulate the pores of the metal. As the pan begins to heat up the pepper corns begin to move sporadically. At this stage the pan is not hot enough, if food is added at this point, this opening and closing pores would bite and latch on to the food's tissue, which would cause the food to stick or even tear.
Lets break it down to what actually happens when you heat up a pan. Heating your pan to proper temperature is the first and most important step in no-oil sautéing. As the pan heats, the molecules begin to expand and move in all directions. This movement causes the pores of the metal to open and close. Try to use the pepper corns to simulate the pores of the metal. As the pan begins to heat up the pepper corns begin to move sporadically. At this stage the pan is not hot enough, if food is added at this point, this opening and closing pores would bite and latch on to the food's tissue, which would cause the food to stick or even tear.
|
|
|
How to Sauté without the Use of Oil
This simple method is a cornerstone of no-oil cooking and will be used as the start to many recipes. Be sure that the pan is hot enough before starting. This technique can also be used for cooking shallots and leek. When adding garlic at this early stage be sure to add it just before adding the liquid. Adding it at this later stage (rather than at an early stage with the onions) allows you to reduce the likelihood of it burning.
This simple method is a cornerstone of no-oil cooking and will be used as the start to many recipes. Be sure that the pan is hot enough before starting. This technique can also be used for cooking shallots and leek. When adding garlic at this early stage be sure to add it just before adding the liquid. Adding it at this later stage (rather than at an early stage with the onions) allows you to reduce the likelihood of it burning.
Cooking aromatics or mirepoix such as onions with no oil is an essential cooking technique to build flavor and lighten up a dish. To dry sauté, meaning to sauté without oil, heating appropriate pan into medium to high heat. Use the water test and see the mercury like balls on the surface of the pan. At this point the onions can be added. Stir regularly to make sure the onions do not burn. As they cook, you will notice the onion as well as the pan will start to brown. Continue to cook until the onion is somewhat translucent. At this point any delicate aromatic like garlic can be added, let cook for only few seconds to avoid burning then immediately add the liquid. Here you can use stock, water, wine or vinegar could be used depending on what you are making. Continue to stir and allow the onion to cooking until most of the liquid has evaporated. At this point you can proceed with whatever you are making.
|
|
Unit TaskSautéing without Oil
Follow the procedure shown in the video and document your activity by taking photos with descriptions. |
PAN TOSSING
Pan tossing is very efficient motion that allows you to quickly move and mix many small pieces of food in one motion. This simple method is fun to learn and it will make cooking that much more enjoyable when you can efficiently toss your food as it cooks. Pan tossing allows you to evenly cook and easily mix food together. In this lesson, you will learn the motion of pan tossing and how to properly toss food while cooking.
To properly pan toss you need to choose a pan with slope sides. This slope allows the foods to slide up the sides of the pan and do somersault back into it. To try and toss in a pan with straight sides will be awkward and inefficient. To get a feel for pan tossing, place a handful of dry beans into the pan, to toss and move the beans, tilt the pan a bit so that the beans gather away from you and hit the slope. Using a quick up and back motion, the beans will hit the front lip of the pan and somersault back towards you. As you push the pan forward, the edge farthest away from you is abruptly lifted and then pulled back. Again tilt the pan slightly, using up and back motion, toss the food back on to itself. Think about it as three different directions. Forward, the up and then back. But its actually one continuous motion. If you were to simply move the pan back and forth, this motion alone will not flip the beans in the pan. It just shuffles them around in the surface. Also, do not focus on trying to make the food on the pan go up in the air. A simple up and down motion will not circulate the food. It can be difficult to toss in slow motion so it will take some practice to get the proper rhythm to do it efficiently. Once you get the hang of it, add a handful of rice and continue tossing. You can see that the two ingredients are separated at first. But as you toss, they evenly mix together. This is what happens to food in the pan during cooking. When pan tossing, it's not about how high the ingredients go, it's just gently tossing and distributing them so they mix and cook evenly.
When cooking most food you don't want to shake the pan too early. Let the food start to cook and develop color before tossing. When ready to toss, use the same motion you practiced. Tilt the pan slightly, so the food hit the slope wall, then lift and pull back towards you. Depending on how heavy the pan is, you may need both hands to toss. When cooking some ingredients, it's important to shake the pan to loosen up the food. If the food does not move about freely, it's not ready to be flipped. Just be patient, let it cook for a moment to brown and then shake again. Although pan tossing can be an accelerating feeling once you know how to do it, it's important that you don't toss the food too often during cooking. Pan tossing should be done periodically and only a few flip each time. By continuously lifting the pan off the heat source, the temperature of the pan will decrease dramatically. In turn the food takes longer to cook and brown.
After tossing the food, give the pan a gentle shake to even out the food, this will ensure that the maximum surface are of the pan is being utilized. Pan tossing is used by chefs and cooks all over the world especially when stir frying or sautéing. By properly learning to pan toss this efficient action will undoubtedly enhance your cooking ability. Practice until you got the rhythm and soon, pan tossing will become a second nature for you.
|
|
Pan tossing
|
Unit Task
Practice Pan Tossing
- Try tossing using cut up zucchini. Make sure the pan is pre-heated and that you are using a stainless steel pan with curve sides. Begin by tossing the diced zucchini for a minute or two (no more). When the zucchini begins to stick, ad a small amount of flavorful liquid to deglaze and then pan toss a bit more. Season with cracked pepper and your favorite chopped herbs/spices as you are tossing. Zucchini should still be firm when it is done.
CARAMELIZING
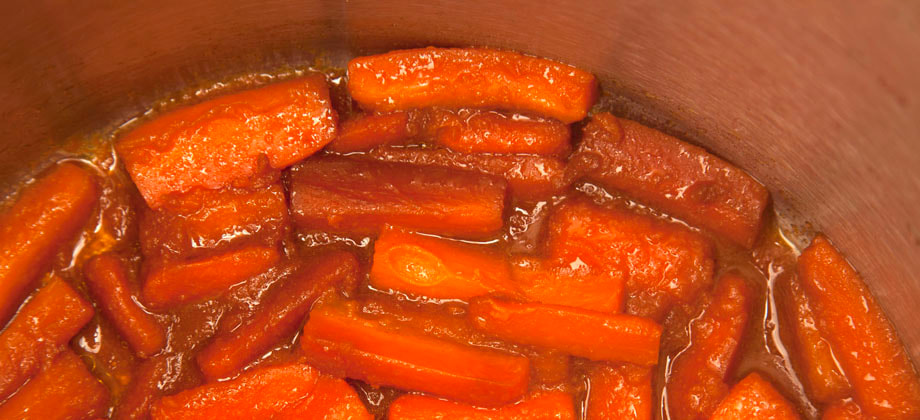
Caramelization and the Maillard reaction are two distinct, yet related forms of non-enzymatic browning reactions that happen during cooking. Both create color, but more importantly they are responsible for the development of rich, nutty, sweet and deep flavors in food. However, if taken too far, both can create harsh and bitter off-flavors.
CARAMELIZATION V.S. MAILLARD REACTION
These terms are often confused or substituted for each other, but they actually describe two different reactions. Cooked foods often times benefit from both reactions. Let's begin with simple definitions.
Caramelization occurs when sugars are cooked at high temperatures. For most sugars (for example, sucrose and fructose), this happens at or just over 160 degrees centigrade. At this temperature, sugars break down and shift from having a simple sweet flavor to taking on a nutty, earthy and otherwise more complex flavor profile. Caramelization typically happens in low-moisture foods or in foods that have had their surface significantly dried to allow browning. If allowed to progress too far, the process of caramelizing quickly turns to burning. Examples include caramelized onions, roasted vegetables (especially higher-sugar vegetables like carrots) and confections.
The Maillard reaction occurs when both sugar and protein are present. Heat breaks down the protein into amino acids, which in turn react with sugars to form color and aroma compounds. While mostly occurring in dry-heat cooking contexts, the Maillard reaction can occur in moist environments, such as in a pressure cooker. The Maillard reaction is encouraged by less acidic environments. For this reason, you can add a very small amount of baking soda (o.5% or less) to a liquid to make a solution with a pH of about 7.5. Examples of foods that undergo the Mallard reaction include bread crusts, roasted coffee or cocoa, and fried foods such as French fries.
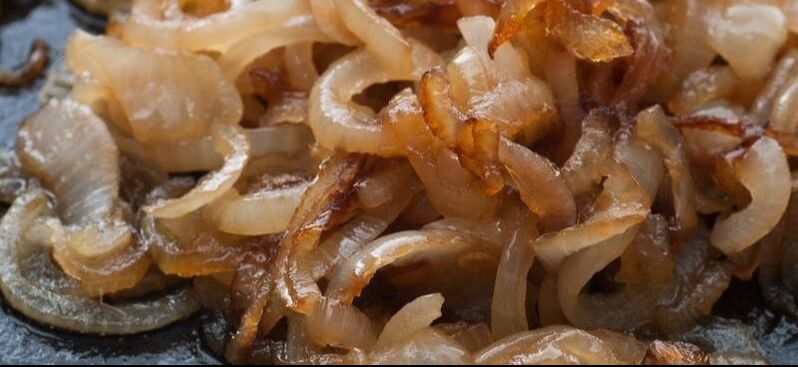
Caramelization
|
Maillard Reaction
|
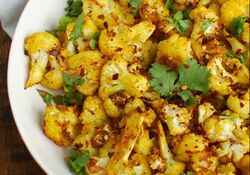
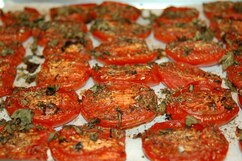
ROASTING VEGETABLES WITHOUT OIL
Roasting is an effortless way to cook vegetables. When cooked properly and to the right doneness, roasted vegetables not only look beautiful they also have delicious and earthy flavor that pairs well with almost any dish. Roasting without oil is a great way to bring out the natural sweetness of vegetables without adding refined sugars or unwanted oil. The key to roasting vegetables without oil is to finish them with a flavorful liquid or with herbs and spices. This will also prevent your roasted vegetables from becoming too dry. Below are some tips you should take note:
Roasting is an effortless way to cook vegetables. When cooked properly and to the right doneness, roasted vegetables not only look beautiful they also have delicious and earthy flavor that pairs well with almost any dish. Roasting without oil is a great way to bring out the natural sweetness of vegetables without adding refined sugars or unwanted oil. The key to roasting vegetables without oil is to finish them with a flavorful liquid or with herbs and spices. This will also prevent your roasted vegetables from becoming too dry. Below are some tips you should take note:
- Use a non-stick roasting pan, parchment paper or silicone baking mat to ensure that vegetables do not stick to the pan.
- If using spray oil, use minor amounts to prevent sticking and help vegetables release properly. One or two short sprays should be sufficient.
- Use small amounts of stock to provide moisture while roasting.
- Slow roasting vegetables and roots in a foil bag allows to steam in their own juices which will also help them retain their sweetness. Using a foil bag in this way combines the benefits of roasting and steaming and is a great way to really bring out the earthy sweetness of beets, sweet potatoes, and squashes.
- When vegetables are roasted without oil, the finished product is a bit drier than it would be otherwise. However, finishing the roasted vegetables and adding flavor post-cooking, such as by tossing them in a small amount of flavorful liquid will boost flavor and add complementary flavor notes to the dish.
Unit Task 1
Prepare the following recipes, take photo of your Mise en place, steaming method and finished course.
Note: Use Submission button below to send completed tasks.
Note: Use Submission button below to send completed tasks.
Unit Tasks
- Photos and descriptions of cooking methods.
- Create a short video summary of the cooking methods you performed. Make sure you capture yourself in the video clip.